고정 헤더 영역
상세 컨텐츠
본문
Kubernetes Scheduler 개요
Kubernetes의 Scheduler는 클러스터 내에서 Pod가 실행될 최적의 Node를 선택하는 컴포넌트입니다.
Pod가 생성되면 Kubernetes는 다양한 스케줄링 정책과 제약 조건을 고려하여 해당 Pod를 어떤 Node에 배치할지 결정합니다.
스케줄링 프로세스
- 사용자가 kubectl apply -f pod.yaml을 실행하거나 API 요청을 보냄
- API Server가 인증(Authentication) 및 인가(Authorization) 진행
- Admission Controller가 정책 검사 후 Pod 생성 승인
- Pod의 초기 상태가 Pending으로 설정되고, ETCD에 저장됨
- 스케줄러가 Pending 상태의 Pod를 감지하고 노드를 선택
- 스케줄러가 Pod의 .spec.nodeName을 업데이트하여 노드를 할당
- Kubelet이 해당 Pod를 감지하고 컨테이너를 실행
- Pod가 실행 중(Running) 상태로 전환
스케줄러의 노드 선택 과정
Filtering
Pod가 실행될 수 있는 노드를 선별하는 과정으로 아래 플러그인들을 활용하여 적절한 노드만 남기게 되며 모든 필터링을 통과한 노드들만 다음 단계로 이동하게 됩니다.
| 플러그인 | 설명 |
| NodeName | Pod가 spec.nodeName에 지정된 특정 노드에만 스케줄링되도록 제한 |
| TaintToleration | 노드의 Taint 값과 Pod의 Toleration 값을 비교하여, 해당 노드에서 실행 가능한지 검토 |
| NodeAffinity | 노드의 특정 레이블을 기반으로 Pod가 배치될 노드를 결정 (required 조건과 preferred 조건 지원) |
| PodTopologySpread | Pod를 특정 Zone, Node 등에 균등하게 분산 배포하도록 제어 |
| InterPodAffinity | 특정 Pod가 실행 중인 노드에 다른 Pod를 배치하거나 분리되도록 설정 |
| NodeResourcesFit | Pod가 요청하는 CPU, 메모리 등의 리소스를 노드가 충분히 제공할 수 있는지 검토 |
| VolumeBinding | Pod가 요청하는 볼륨이 특정 노드에서 바인딩될 수 있는지 확인 후 배포 가능 여부 결정 |
| NodeUnschedulable | 관리자가 kubectl cordon 명령으로 노드를 예약 불가 상태로 설정한 경우 스케줄링에서 제외 |
| NodePorts | Pod가 특정 hostPort를 사용할 경우, 해당 포트가 이미 사용 중인지 확인하여 스케줄링 결정 |
참고 : 대규모 클러스터(예: 노드 수가 1000대 이상)에서는 성능 최적화를 위해 기본적으로 전체 노드의 50%만 필터링 대상으로 평가하며, 이 비율은 percentageOfNodesToScore 설정 값을 통해 조정할 수 있습니다.
Scoring
필터링을 통과한 노드들 중에서 가장 적절한 노드를 선택하기 위해 점수를 부여하는 과정으로 노드별 점수를 계산하고 점수가 가장 높은 노드에 Pod를 배치합니다.
| 플러그인 | 가중치(Weight) | 설명 |
| TaintToleration | 3 | 특정 Taint가 설정된 노드에 Pod를 우선 배치 |
| NodeAffinity | 2 | 특정 레이블을 가진 노드를 우선 선택하도록 가중치 부여 |
| PodTopologySpread | 2 | Pod가 특정 Zone/Node에 과도하게 배치되지 않도록 가중치 설정 |
| InterPodAffinity | 2 | 특정 Pod와 동일한 노드에서 실행되도록 우선순위 설정 |
| NodeResourcesFit | 1 | 사용 가능한 CPU/메모리 리소스가 많은 노드를 우선 선택 |
| VolumeBinding | 1 | 바인딩된 볼륨이 있는 노드를 우선 배치 |
| NodeResourcesBalancedAllocation | 1 | CPU와 메모리 사용률이 균형 잡힌 노드를 선호 |
| ImageLocality | 1 | 컨테이너 이미지가 캐시된 노드를 우선 선택 |
점수 계산 방식
- 각 플러그인은 특정 노드에 점수 부여
- 점수가 가장 높은 노드에 Pod 배치
- 동일한 점수를 가진 노드가 여러 개일 경우 랜덤으로 선택
참고 : KubeSchedulerConfiguration에서 특정 플러그인의 가중치를 조정할 수 있습니다.
Binding
스케줄러는 점수가 가장 높은 노드에 Pod를 바인딩하는 단계로 PreBind→Bind→PostBind의 세 단계로 진행됩니다.
최종적으로 spec.nodeName 필드가 업데이트되며 Pod가 해당 노드에 배치됩니다.
Pod 스케줄링 제어 목적
- 특정 조건을 가진 노드에서만 파드 실행 제한
- 여러 조건에 맞는 노드 중 하나에서 실행되도록 제한
- GPU 등의 특별한 장치를 가진 노드에 Pod 배포
- 서로 다른 Pod를 동일한 노드 혹은 동일한 가용 영역에 배포
Pod 스케줄링 대기
- 파드 생성 후 스케줄링이 일어나는 시점을 제어할 때 사용 가능
- spec.schedulingGates 필드에 값을 추가 또는 삭제해 제어
- schedulingGates 필드는 파드를 생성할 때만 초기화 가능
- 생성 후에는 제거만 가능하고 추가는 허용되지 않음
- 쿠버네티스 v1.30 버전에서 Stable 단계
# 예시 : kin를 사용하여 k8s 배포
kind create cluster --name myk8s --image kindest/node:v1.32.2 --config - <<EOF
kind: Cluster
apiVersion: kind.x-k8s.io/v1alpha4
nodes:
- role: control-plane
EOF

# 파드 생성
cat <<EOF | kubectl apply -f -
apiVersion: v1
kind: Pod
metadata:
  name: test-pod
spec:
  schedulingGates:
  - name: example.com/foo
  - name: example.com/bar
  containers:
  - name: pause
    image: registry.k8s.io/pause:3.6
  terminationGracePeriodSeconds: 0
EOF
# Pod 확인
kubectl get pod
NAME READY STATUS RESTARTS AGE
test-pod 0/1 SchedulingGated 0 13s
# test-pod의 schedulingGates 필드 값을 확인
kubectl get pod test-pod -o jsonpath='{.spec.schedulingGates}'# 스케줄러가 해당 파드를 스케줄링할 수 있도록 schedulingGates를 제거하고, 수정된 매니페스트를 적용하여 스케줄링 가능하도록 변경
cat <<EOF | kubectl apply -f -
apiVersion: v1
kind: Pod
metadata:
name: test-pod
spec:
containers:
- name: pause
image: registry.k8s.io/pause:3.6
terminationGracePeriodSeconds: 0
EOF# schedulingGates 필드가 제거되었는지 확인
kubectl get pod test-pod -o jsonpath='{.spec.schedulingGates}'
# Pod 확인
kubectl get pod
#NAME READY STATUS RESTARTS AGE
#test-pod 1/1 Running 0 102s
# 노드 스케줄링되어서 아래 nodename 출력!
kubectl get pod -o yaml | grep -i nodename
# nodeName: myk8s-control-plane
SchedulingGated 상태의 제약 사항
- .spec.nodeSelector가 이미 있다면 → 조건 추가는 가능, 수정은 불가
- .spec.affinity.nodeAffinity가 없다면 → 설정 가능
- 이미 존재하는 required 조건은 추가만 허용, 삭제나 변경 불가
- preferred 조건에 대해서는 자유롭게 수정 가능
노드 기반
kubernetes에서 특정 노드에 Pod를 배치하는 방식에는 NodeSelector & NodeAffinity 두가지 주요 방식이 있습니다.
| 항목 | NodeSelector | NodeAffinity |
| 설정 위치 | .spec.nodeSelector | .spec.affinity.nodeAffinity |
| 조건 지정 방식 | 단순 key=value 매칭 | 다양한 연산자 사용 가능 |
| 지원 연산자 | 없음 | In, NotIn, Exists, DoesNotExist, Gt, Lt |
| 조건 구조 | 모든 조건을 모두 만족해야 함 (AND) | 필수 조건 + 선호 조건 구분 가능 |
| 사용 유연성 | 제한적 | 매우 유연함 |
# 예시
apiVersion: v1
kind: Pod
metadata:
  name: nginx
  labels:
    app: nginx
spec:
  nodeSelector:
    disktype: ssd
  containers:
    - name: web
      image: nginx
      ports:
        - name: web
          containerPort: 80
          protocol: TCP

...

apiVersion: v1
kind: Node
metadata:
  name: k8s-2
  labels:
    disktype: ssd
    kubernetes.io/arch: arm64
    kubernetes.io/hostname: k8s-2
    kubernetes.io/os: linux
선호도 기반 배포
Affinity & Anti-Affinity
- NodeSelector보다 다양한 조건을 지원하는 방식
- 연산자: In, NotIn, Exists, DoesNotExist, Gt, Lt
- NodeAffinity 기능으로 배포할 노드 조건을 정교하게 설정 가능
- PodAffinity를 이용해 파드 간 배포 조건 제어 가능
- NodeAffinity 형식
- requiredDuringSchedulingIgnoredDuringExecution : 반드시 만족해야 하는 조건
- preferredDuringSchedulingIgnoredDuringExecution : 선호하는 조건
오퍼레이터 종류
NodeAffinity & PodAffinity에서 사용 가능한 연산자
| 오퍼레이터 | 작동 방식 |
| In | 지정한 레이블 값이 values 문자열 집합 안에 포함되는지 검사 |
| NotIn | 지정한 레이블 값이 values 문자열 집합 안에 없는지 검사 |
| Exists | 지정한 레이블 키가 대상 노드 혹은 파드에 존재하는지 검사 |
| DoesNotExist | 지정한 레이블 키가 대상 노드 혹은 파드에 존재하지 않는지 검사 |
NodeAffinity에서만 사용 가능한 연산자
| 오퍼레이터 | 작동 방식 |
| Gt | 대상 레이블 값이 정의한 값보다 큰지 검사 |
| Lt | 대상 레이블 값이 정의한 값보다 작은지 검사 |
# 예시
apiVersion: v1
kind: Pod
metadata:
  name: nginx
spec:
  containers:
   - name: web
     image: nginx
  affinity:
   nodeAffinity:
     requiredDuringSchedulingIgnoredDuringExecution:
       nodeSelectorTerms:
         - matchExpressions:
             - key: kubernetes.io/os
               operator: In
               values:
                 - linux
     preferredDuringSchedulingIgnoredDuringExecution:
       - weight: 10
         preference:
           matchExpressions:
             - key: disktype
               operator: In
               values:
                 - ssd
       - weight: 1
         preference:
           matchExpressions:
             - key: disktype
               operator: In
               values:
                 - hdd
PodAffinity & PodAntiAffinity
- Pod 간 위치 관계를 제어할 수 있는 스케줄링 방식
- PodAffinity: 특정 Pod가 존재하는 노드 또는 topology에 함께 배치되도록 설정
- PodAntiAffinity: 특정 Pod가 있는 위치에는 배치되지 않도록 설정
- 반드시 topologyKey 설정이 필요 (예: zone, hostname)
- labelSelector를 통해 기준 Pod를 지정
예를 들어, 같은 서비스 레이블을 가진 Pod들이 서로 다른 zone에 분산되지 않게 하거나 DB Pod와 Web Pod가 같은 노드에 배치되도록 설정할 수 있습니다.
# 예시 : DB Pod와 동일한 존에 Web Pod를 배포하는 PodAffinity 설정
apiVersion: apps/v1
kind: Deployment
metadata:
  name: nginx-with-db
...
affinity:
  podAffinity:
    requiredDuringSchedulingIgnoredDuringExecution:
      - labelSelector:
          matchExpressions:
            - key: app
              operator: In
              values:
                - mysql
        topologyKey: topology.kubernetes.io/zone
matchLabelKeys
Pod(Anti)Affinity 조건에 사용할 레이블 키를 명시적으로 지정
일반적으로 pod-template-hash 레이블 사용
롤링 업데이트 중 이전 리비전 파드로 인한 혼란 방지
Kubernetes v1.31에서 Beta 단계
Pod 분산 제어: Topology Spread Constraints
클러스터 내에서 파드를 균등하게 분산 배포하는 방식
topologyKey를 사용해 노드 그룹을 지정
maxSkew 설정을 통해 각 노드 그룹에 균등하게 파드 배포

# YAML 예제
spec:
  containers:
    - name: nginx
      image: nginx:1.14.2
      ports:
        - containerPort: 80
      resources:
        requests:
          memory: 1Gi
        limits:
          memory: 1Gi
  topologySpreadConstraints:
    - maxSkew: 1
      topologyKey: topology.kubernetes.io/zone
      whenUnsatisfiable: DoNotSchedule
      labelSelector:
        matchLabels:
          app: nginx
# 파드 수를 늘리면 zone 단위로 고르게 배포되는 것을 확인
$ kubectl get pods --sort-by=.spec.nodeName -n topology-demo \
-o custom-columns=NAME:.metadata.name,NODE:.spec.nodeName
...
NAME NODE
nginx-topology-spread-f5cb9c9db-6k9vj k8s-1
nginx-topology-spread-f5cb9c9db-9nlml k8s-1
nginx-topology-spread-f5cb9c9db-rznfp k8s-1
nginx-topology-spread-f5cb9c9db-xqszt k8s-1
nginx-topology-spread-f5cb9c9db-ksdff k8s-2
nginx-topology-spread-f5cb9c9db-n49g8 k8s-2
nginx-topology-spread-f5cb9c9db-pnswk k8s-3
nginx-topology-spread-f5cb9c9db-vpwp5 k8s-3
노드에서 Pod 제외: Taints & Tolerations
- 노드에서 Pod를 제외하는 형태로 제어하고 싶을 때 사용
- Taints 붙은 노드에 파드를 배포하기 위해 Tolerations 필요
- 노드 실패 시 다른 노드로 Pod를 이동하도록 제어
- Taint 추가 시 NoExecute 효과 적용
- 일부 노드를 독점적으로 사용하도록 Taint & Toleration 적용
# 예시 : kubectl taint 명령을 이용해 노드에 Taint 속성 추가
$ kubectl taint nodes k8s-3 dedicated=devGroup:NoSchedule
# Pod 배포에 필요한 조건을 tolerations 필드로 추가
tolerations:
- key: dedicated
operator: Equal
value: devGroup
effect: NoSchedule
...
# tolerations 필드 추가 후에 k8s-3 노드에 배포 가능
$ kubectl get pods -n taint-demo
NAME READY STATUS RESTARTS AGE
nginx-demo 1/1 Running 0 10m
리소스 단편화
- 클러스터 전체적인 리소스 여유 공간은 충분한 상태
- 하지만 Pod에서 요청한 일부 리소스 부족으로 인해 실행 불가
- 리소스 단편화로 인해 필요한 리소스를 한 노드에서 모두 할당할 수 없는 상황
- CPU, Memory 리소스는 상대적으로 발생할 확률이 낮음
- GPU 리소스는 상대적으로 자주 발생하는 문제
- 일반적으로 서버 한 대당 4, 8, 10 정도의 GPU 장치를 장착해 사용
- 스케줄러는 기본적으로 리소스가 좀 더 남아있는 노드 선택
- Pod에서 GPU 리소스를 요청한 경우 고르게 배포될 수 있도록 노드 선택
- 항상 1 GPU 리소스만 요청한다면 거의 발생하지 않는 문제
- LLM 등의 Pod에서 멀티 GPU 리소스를 요청할 경우 발생 가능
- 노드 별로 한 두 개 정도의 GPU 리소스만 남아있는 상황
- 단일 노드에서 요청한 GPU 리소스를 모두 확보하기 어려운 상황 발생


Resource Bin Packing
- 리소스 사용량이 높은 노드를 먼저 선택해 사용하는 방식
- 노드 리소스 사용량이 올라가지만 Pod 가용성은 떨어질 수 있음
- NodeResourcesFit 스코어링 설정을 변경해 적용
- LeastAllocated: 노드 사용량이 낮은 노드를 먼저 선택
- MostAllocated: 노드 사용량이 높은 노드를 먼저 선택
- 변경된 설정을 가진 별도 스케줄러를 사용하는 방식 가능
# 예시 : MostAllocated 설정
...
pluginConfig:
  - name: NodeResourcesFit
    args:
     apiVersion: kubescheduler.config.k8s.io/v1
     kind: NodeResourcesFitArgs
     scoringStrategy:
       type: MostAllocated	# NodeResourceFit 플러그인에 MostAllocated 전략 설정
       resources:
         - name: cpu
           weight: 1
         - name: nvidia.com/gpu
           weight: 3
...
# ConfigMap 리소스 생성
## 스케줄러 설정을 ConfigMap 리소스로 생성해 저장
apiVersion: v1
kind: ConfigMap
metadata:
name: my-scheduler-config
namespace: kube-system
data:
my-scheduler-config.yaml: |
apiVersion: kubescheduler.config.k8s.io/v1
kind: KubeSchedulerConfiguration
leaderElection:
leaderElect: false
profiles:
- schedulerName: my-scheduler
pluginConfig:
- name: NodeResourcesFit
...# RBAC 설정
# ServiceAccount 생성 및 리소스 접근 권한 추가
apiVersion: v1
kind: ServiceAccount
metadata:
name: my-scheduler
namespace: kube-system
...
apiVersion: rbac.authorization.k8s.io/v1
kind: ClusterRole
metadata:
name: my-scheduler
rules:
- apiGroups: [""]
resources: ["pods", "pods/status", "pods/binding"]
...
apiVersion: rbac.authorization.k8s.io/v1
kind: ClusterRoleBinding
metadata:
name: my-scheduler
roleRef:
apiGroup: rbac.authorization.k8s.io
kind: ClusterRole
name: my-scheduler
subjects:
- kind: ServiceAccount
name: my-scheduler
namespace: kube-system# Deployment 생성
## 스케줄러 설정에 저장된 ConfigMap 리소스를 볼륨으로 연결
apiVersion: apps/v1
kind: Deployment
...
spec:
template:
...
spec:
volumes:
- name: my-scheduler-config
configMap:
name: my-scheduler-config
items:
- key: my-scheduler-config.yaml
path: my-scheduler-config.yaml
# 스케줄러 실행 옵션에 앞ㅇ에서 생성한 스케줄러 설정 파일 지정
...
serviceAccountName: my-scheduler
serviceAccount: my-scheduler
containers:
- name: my-scheduler
image: registry.k8s.io/kube-scheduler:v1.31.0
command:
- /usr/local/bin/kube-scheduler
- '--leader-elect=false'
- '--config=/etc/kubernetes/my-scheduler-config.yaml'
volumeMounts:
- name: my-scheduler-config
mountPath:/etc/kubernetes/# 파드를 생성할때 새로 생성한 스케줄러 이름을 지정해 사용
apiVersion: apps/v1
kind: Deployment
metadata:
name: nginx
labels:
app: nginx
spec:
...
template:
spec:
schedulerName: my-scheduler
containers:
- name: nginx
image: nginx:latest
metadata:
labels:
app: nginx
LeastAllocated 전략을 사용한 Pod 배포

MostAllocated 전략을 사용한 Pod 배포

Terraform
Terraform은 HashiCorp에서 개발한 오픈소스 IaC(Infrastructure as Code) 도구입니다.
코드를 이용해 인프라를 선언적으로 관리하고 프로비저닝할 수 있도록 설계되었습니다.

하시코프의 철학 중 3가지를 담아서 Terraform을 설계 : 워크플로우에 집중, 코드형 인프라, 실용주의
Terraform의 제공 유형
Terraform은 사용자의 환경과 요구 사항에 맞게 세 가지 유형으로 제공됩니다.
- On-premise (Terraform CLI, 오픈소스 버전)
- 사용자의 컴퓨팅 환경에서 오픈소스 바이너리 툴인 Terraform CLI를 실행하는 방식입니다.
- 로컬 환경에서 실행되며, 별도의 중앙 관리 기능 없이 개별적으로 실행됩니다.
- 코드 작성과 실행을 위해 로컬 스테이트 파일(예: terraform.tfstate)을 관리해야 합니다.
- Hosted SaaS (Terraform Cloud)
- HashiCorp에서 제공하는 SaaS(Software as a Service) 형태의 Terraform 서비스입니다.
- Terraform Cloud는 중앙에서 관리되는 환경을 제공하며, 원격 상태 관리 및 정책 기반 인프라 관리를 지원합니다.
- 사용자는 클라우드 기반에서 Terraform 실행을 관리할 수 있으며, 협업 기능과 액세스 제어가 포함됩니다.
- Private Install (Terraform Enterprise)
- 기업 내에서 자체적으로 설치하여 운영하는 Terraform의 온프레미스 버전입니다.
- 외부 네트워크와 격리된 환경에서 실행할 수 있으며, 기업의 보안 정책에 따라 프로비저닝을 관리할 수 있습니다.
- 대규모 조직에서 정책 및 규정 준수를 유지하면서 Terraform을 활용할 수 있습니다.
- Terraform Enterprise에 대한 자세한 내용은 여기에서 확인할 수 있습니다.
Terraform Cloud 가격 정책
Terraform Cloud는 사용자의 필요에 따라 다양한 플랜을 제공합니다.
| 플랜 | 주요 특징 |
| Free | 최대 500개의 리소스까지 무료로 사용 가능하며 커뮤니티 버전 제공 |
| Standard | free 플러스 워크플로우 기능 추가 및 동시 실행(Concurrency) 3개까지 지원 |
| Plus | 정책, 보안, 신뢰성, 확장성이 강화된 플랜으로 대규모 사용자를 위한 기업형 모델 |
| Enterprise | lus 플랜과 유사하지만, 온프레미스 설치형 모델을 제공하여 기업 내 환경에서 직접 운영 가능 |
Terraform 환경 구성
실행 환경 구성 (3가지 방법)
- 미리 빌드된 바이너리 다운로드
- Terraform 소스 코드 다운로드 후 빌드
- OS 패키지 관리자 활용
버전 선택
- 최신 안정 버전 사용 권장 (하위 버전 호환, 기능 개선, 버그 수정 포함)
- Terraform 바이너리 네이밍 규칙
- terraform_<버전>_<OS>_<CPU>.zip
PATH 설정
- 리눅스/macOS: /usr/bin
- Windows: C:\windows\system32
macOS - brew, tfenv(권장) 사용 - 테라폼 버전 v1.5.6
# tfenv 설치
brew install tfenv

# 설치 가능 버전 리스트 확인
tfenv list-remote

# 테라폼 1.5.6 버전 설치
tfenv install 1.5.6

# tfenv로 설치한 버전 확인(변경 전)
tfenv list
  1.5.6
* 1.5.1 (set by /usr/local/Cellar/tfenv/3.0.0/version)

# 테라폼 1.5.6 버전 사용 설정
tfenv use 1.5.6

# tfenv로 설치한 버전 확인(변경 후)
tfenv list
* 1.5.6 (set by /usr/local/Cellar/tfenv/3.0.0/version)
  1.5.1

# 테라폼 버전 정보 확인
terraform version

# 자동완성
terraform -install-autocomplete
## 참고 .zshrc 에 아래 추가됨
cat ~/.zshrc
autoload -U +X bashcompinit && bashcompinit
complete -o nospace -C /usr/local/bin/terraform terraform
Windows - WSL2 리눅스 환경 설치 후 사용(본 실습에서 사용)
# Terraform 설치
wget -O- https://apt.releases.hashicorp.com/gpg | sudo gpg --dearmor -o /usr/share/keyrings/hashicorp-archive-keyring.gpg
echo "deb [signed-by=/usr/share/keyrings/hashicorp-archive-keyring.gpg] https://apt.releases.hashicorp.com $(lsb_release -cs) main" | sudo tee /etc/apt/sources.list.d/hashicorp.list
sudo apt update && sudo apt install terraform

# Terraform 버전 정보 확인
terraform version
IDE 구성
Terraform 실습을 위해 Visual Studio Code (VS Code)를 설치하여 사용합니다.
- 확장 프로그램 (Extensions) 설치
- VS Code 좌측 [Extensions] 아이콘 클릭 → HashiCorp 관련 확장 프로그램 검색 및 설치
- 필수 확장 프로그램
- HashiCorp HCL: HCL 파일을 위한 문법 강조(Syntax Highlighting) 제공
- HashiCorp Terraform: Terraform 코드 하이라이팅 및 기능 지원

주요 커맨드
init 초기화
# 테라폼 실행을 위해 코드 파일이 있는 디렉터리로 이동
# (참고) 테라폼이 실행되는 디렉터리 = 모듈(테라폼 코드 파일과 변수 파일), 기본 작업디렉터리는 '루트 모듈', 호출 모듈은 '자식 모듈'
cd 03.start/

# plan
terraform plan
│ Error: Inconsistent dependency lock file
│
│ The following dependency selections recorded in the lock file are inconsistent with the current configuration:
│   - provider registry.terraform.io/hashicorp/local: required by this configuration but no version is selected
│
│ To make the initial dependency selections that will initialize the dependency lock file, run:
│   terraform init

# 초기화 : 코드 사용 구문 기반으로 필요한 프로바이더 플러그인을 찾고 설치, 추가로 '프로바이더/모듈/백엔드' 구성 설정/변경 시 수행 필요
terraform init
ls -al
tree .terraform  # VS Code에서 탐색기 확인
이 에러는 Terraform을 처음 실행할 때 terraform init 명령어로 초기 설정을 하지 않아서 발생한 것입니다.
코드에는 프로바이더를 사용하겠다고 적혀 있지만 Terraform이 아직 어떤 버전을 설치해야 할지 모르는 상태입니다.
초기화를 하면 필요한 프로바이더를 설치하고 설정 파일을 만들어줘서 문제를 해결할 수 있습니다.

plan 계획 & apply 실행
terraform plan → 무엇이 바뀔지 미리 보여주는 단계(실제로 인프라에 적용되지 않음)
terraform apply → 실제로 그 변경을 적용하는 단계
# plan 실행 : 구성 내용을 바탕으로 어떤 리소스가 생성되는지 상세 내역 출력, 기본값 자동 입력 적용
terraform plan
Terraform used the selected providers to generate the following execution plan. Resource actions are indicated with the following symbols:
  + create

Terraform will perform the following actions:

  # local_file.abc will be created
  + resource "local_file" "abc" {
      + content              = "abc!"
      + content_base64sha256 = (known after apply)
      + content_base64sha512 = (known after apply)
      + content_md5          = (known after apply)
      + content_sha1         = (known after apply)
      + content_sha256       = (known after apply)
      + content_sha512       = (known after apply)
      + directory_permission = "0777"
      + file_permission      = "0777"
      + filename             = "./abc.txt"
      + id                   = (known after apply)
    }

Plan: 1 to add, 0 to change, 0 to destroy. # 하나의 리소스가 추가되고, 변경되거나 삭제되는 것은 없을 예정
# plan 결과를 시스템 코드로 출력
terraform plan -detailed-exitcode
...

# 코드 확인 : 0(변경 사항이 없는 성공), 1(오류가 있음), 2(변경 사항이 있는 성공)
echo $?
2

# (참고) apply 결과에 적용 시도
terraform apply -auto-approve -detailed-exitcode
# apply 실행 : no 입력
terraform apply
...
Enter a value: no
...

# plan 결과를 지정된 파일(바이너리 형태) 이름으로 생성
terraform plan -out=tfplan
cat tfplan
file tfplan

# apply 실행 : 실행계획이 있으므로 즉시 적용됨
terraform apply tfplan
ls -al abc.txt

# apply 실행 : 어떻게 되나요?
# 테라폼은 선언적 구성 관리를 제공하는 언어로 멱등성 idempotence을 갖고, 상태를 관리하기 때문에 동일한 구성에 대해서는 다시 실행하거나 변경하는 작업을 수행하지 않음
terraform apply
...

terraform state list


변경할 내용이 없고 아무 작업도 수행되지 않았다는 것을 알려줍니다. 이는 현재 상태가 코드에서 기대하는 모습 그대로 유지되고 있다는 뜻입니다.
# 코드 파일 수정
resource "local_file" "abc" {
content = "abc!"
filename = "${path.module}/abc.txt"
}

resource "local_file" "dev" {
  content  = "def!"
  filename = "${path.module}/def.txt"
}
# apply 실행 : 변경(신규 추가) 부분만 반영 확인
terraform apply
...
# local_file.dev will be created
+ resource "local_file" "dev" {
...
Enter a value: yes
# 확인
terraform state list
tree
ls *.txt
# 변경 이전의 실행 계획 적용 시도 > 어떻게 될까요?
terraform apply tfplan
...

이 에러 메시지는 Terraform이 저장된 실행 계획(plan)을 적용하려고 했지만 그 사이에 인프라 상태(state)가 변경되었기 때문에 더 이상 해당 계획을 적용할 수 없다는 뜻입니다.
이를 해결하기 위해선 계획(plan)을 새로 생성 한 후 다시 적용해야 합니다.
destory 제거 & fmt
Terraform 구성을 통해 관리되고 있는 모든 리소스를 한 번에 제거하는 명령어입니다.
주로 테스트 종료, 리소스 정리, 비용 절감 등을 위해 사용됩니다.
전체가 아닌 특정 리소스만 제거하려면 -target 옵션을 사용합니다.
#
terraform destroy
...
Enter a value: yes
...

# 확인
terraform state list
ls *.txt
fmt는 format 또는 reformat의 줄임말로, terraform fmt 명령어를 사용하여 실행합니다.
이 명령어는 Terraform 구성 파일을 표준 형식과 스타일에 맞게 자동 정리해 주며,
코드의 일관성 유지와 가독성 향상에 도움이 됩니다.
# 적용 후 코드 파일 내용 확인 -> 들여쓰기 확인
terraform fmt
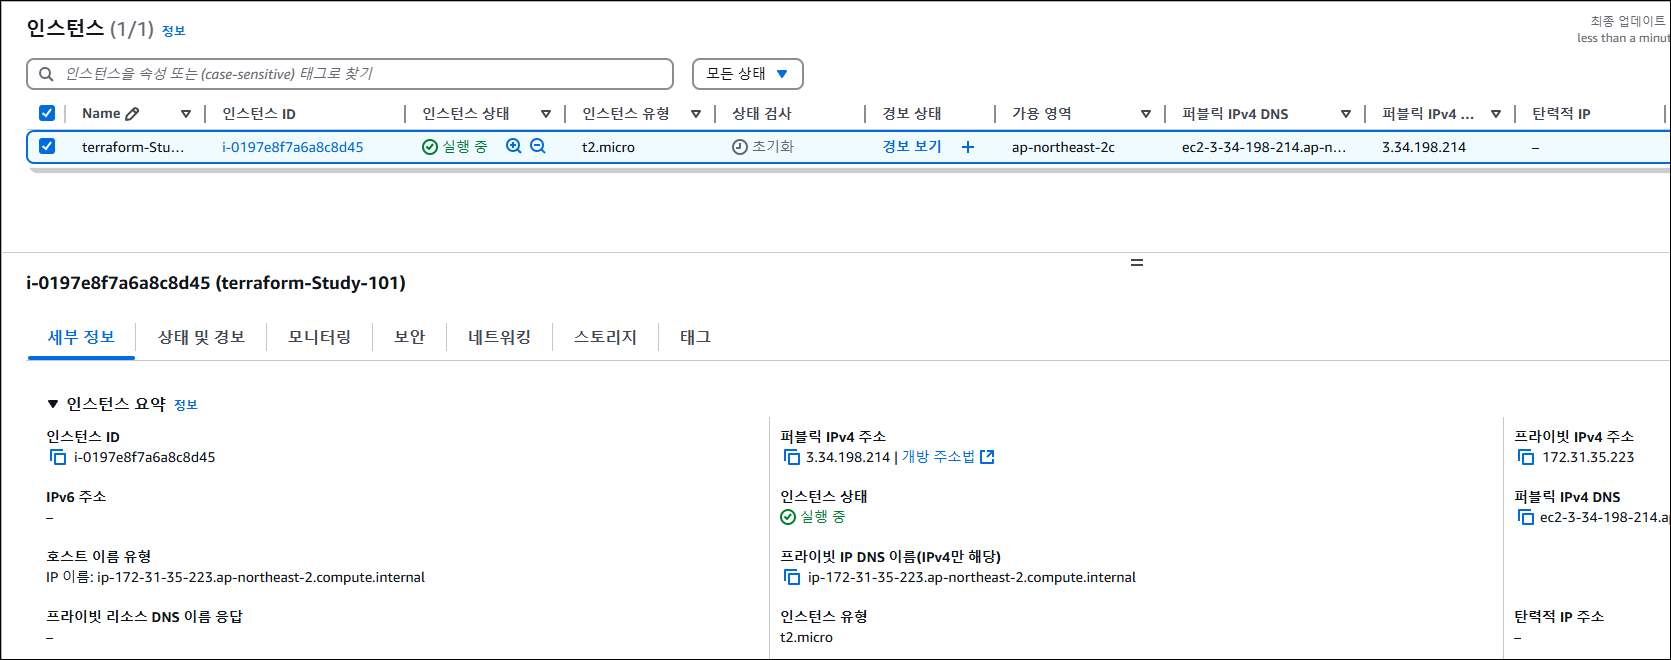
EC2 1대 배포 & 웹 서버 설정
# 각자 편한 디렉터리를 생성
cd ..
mkdir t101-1week-web
cd t101-1week-web
# EC2 1대를 배포하면서 userdata 에 웹 서버 설정 → 간단한 애플리케이션 설정 자동화
cat <<EOT > main.tf
provider "aws" {
region = "ap-northeast-2"
}
resource "aws_instance" "example" {
ami = "ami-0c9c942bd7bf113a2"
instance_type = "t2.micro"
user_data = <<-EOF # user_data에 실행 명령어 작성
#!/bin/bash
echo "Hello, T101 Study" > index.html
nohup busybox httpd -f -p 8080 &
EOF
tags = {
Name = "terraform-Study-101"
}
}
EOT# 배포 실행
# init
terraform init
# plan
terraform plan
+ user_data = "d91ca31904077f0b641b5dd5a783401396ffbf3f"
# apply 실행
terraform apply -auto-approve
# 변수 지정
# PIP=<각자 자신의 EC2 Public IP>
PIP=3.34.198.214
while true; do curl --connect-timeout 1  http://$PIP:8080/ ; echo "------------------------------"; date; sleep 1; done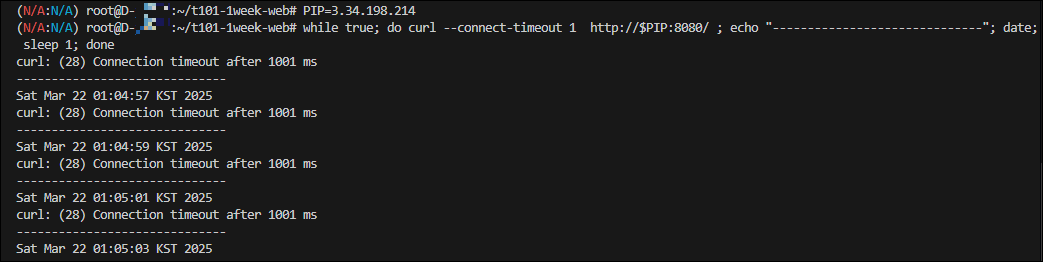
cat <<EOT > main.tf
provider "aws" {
  region = "ap-northeast-2"
}

resource "aws_instance" "example" {
  ami                    = "ami-0c9c942bd7bf113a2"
  instance_type          = "t2.micro"
  vpc_security_group_ids = [aws_security_group.instance.id]

  user_data = <<-EOF
              #!/bin/bash
              echo "Hello, T101 Study" > index.html
              nohup busybox httpd -f -p 8080 &
              EOF

  tags = {
    Name = "Single-WebSrv"
  }
}

resource "aws_security_group" "instance" {
  name = var.security_group_name

  ingress {
    from_port   = 8080
    to_port     = 8080
    protocol    = "tcp"
    cidr_blocks = ["0.0.0.0/0"]
  }
}

variable "security_group_name" {
  description = "The name of the security group"
  type        = string
  default     = "terraform-example-instance"
}

output "public_ip" {
  value       = aws_instance.example.public_ip
  description = "The public IP of the Instance"
}
EOT
# plan/apply
terraform plan
terraform apply -auto-approve

추가 - 8080에서 9090으로 포트 변경하는 방법
EC2의 user_data는 한 번만 실행되기 때문에, Terraform에서 변경 시 기존 인스턴스를 삭제하고 새로 만듭니다.
즉, user_data 수정 = EC2 인스턴스 교체 (replace) 입니다.
# main.tf 파일 변경
cat <<EOT > main.tf
provider "aws" {
  region = "ap-northeast-2"
}

resource "aws_instance" "example" {
  ami                    = "ami-0c9c942bd7bf113a2"
  instance_type          = "t2.micro"
  vpc_security_group_ids = [aws_security_group.instance.id]

  user_data = <<-EOF
              #!/bin/bash
              echo "Hello, T101 Study 9090" > index.html
              nohup busybox httpd -f -p 9090 &
              EOF

  user_data_replace_on_change = true

  tags = {
    Name = "Single-WebSrv"
  }
}

resource "aws_security_group" "instance" {
  name = var.security_group_name

  ingress {
    from_port   = 9090
    to_port     = 9090
    protocol    = "tcp"
    cidr_blocks = ["0.0.0.0/0"]
  }
}

variable "security_group_name" {
  description = "The name of the security group"
  type        = string
  default     = "terraform-example-instance"
}

output "public_ip" {
  value       = aws_instance.example.public_ip
  description = "The public IP of the Instance"
}
EOT


# 참고 : 리소스 삭제
terraform destroy -auto-approve
만약 서버의 포트가 자주 변경된다면 몇 가지 방법으로 그 불편함을 줄일 수 있습니다.
- SSM Parameter Store 등을 활용해 포트 번호를 외부에서 관리하면 user_data에서 해당 값을 동적으로 받아올 수 있어 EC2를 새로 생성하지 않고도 설정을 변경할 수 있습니다. 이렇게 하면 Terraform 코드 수정 없이도 서버 내부 설정만으로 포트를 바꿀 수 있습니다.
- Docker ECS EKS와 같은 컨테이너 기반 환경을 사용하면 포트 설정을 환경변수나 설정 파일로 유연하게 관리할 수 있어 인스턴스를 교체할 필요 없이 애플리케이션만 재시작하거나 재배포하면 됩니다.
- Application Load Balancer(ALB) 등을 활용해 외부 접근 포트를 고정하면 EC2 내부 포트가 변경되더라도 사용자 입장에서는 항상 동일한 포트를 통해 접근할 수 있어 운영이 더 간편해집니다.
추가로 user_data_replace_on_change = false를 설정하고 user_data를 바꾼 뒤 terraform apply를 실행하면 Terraform은 EC2 인스턴스를 교체하지 않고 기존 인스턴스를 그대로 유지합니다.
즉, user_data의 변경 내용은 EC2에 반영되지 않으며, 아무런 동작도 수행되지 않습니다.
왜냐하면 EC2의 user_data는 인스턴스 생성 시 최초 1회만 실행되며 인스턴스가 계속 유지되는 동안에는 변경되더라도 다시 실행되지 않기 때문입니다.
HCL (HashiCorp Configuration Language)
HCL은 HashiCorp에서 IaC(Infrastructure as Code) 및 구성 정보를 명시하기 위해 개발한 오픈 소스 구성 언어로 Terraform 등 HashiCorp 제품에서 인프라를 코드로 정의할 때 주로 사용됩니다.

HCL의 특징
- IaC는 인프라를 수동으로 구성하지 않고, 코드로 관리하고 프로비저닝하는 방식을 의미합니다.
- Terraform에서 HCL은 구성을 정의하는 코드로 사용되며, 사람이 읽기 쉬우면서 배우기 쉬운 문법을 제공합니다.
- 인프라가 코드로 표현되기 때문에 선언형(declarative) 특성을 가지며 동시에 조건문과 같은 프로그래밍적 기능을 사용
- 할 수 있는 튜링 완전한(Turing-complete) 언어적 성격을 가집니다.
- 코드 기반으로 작성되기 때문에 자동화, 버전 관리, 히스토리 관리, 협업 등이 용이합니다.
| HCL을 이용한 테라폼 구성 | JSON을 이용한 CloudFormation 구성 |
| resource "local_file" "abc" { content = "abc!" filename = "${path.module}/abc.txt" } |
{ "resource": [ { "local_file": [ { "abc": [ { "content":"abc!", "filenale":"${path.module}/abc.txt" } ] } ] } ] } |
- HCL은 간결하고 직관적인 문법을 제공하며, JSON은 구문이 복잡하고 주석을 지원하지 않습니다.
- HCL은 인터폴레이션(Interpolation) 문법을 통해 변수와 문자열을 자연스럽게 결합할 수 있습니다.
| HCL을 이용한 테라폼 구성 | JSON을 이용한 CloudFormation 구성 |
| name = “{$var.PilotServerName}-vm” | “name”:”{”Fn::Join”:[”-”,[PilotServerName,vm]]}” |
HCL을 사용하는 이유
- JSON과 YAML은 기계 친화적으로 설계되었지만, HCL은 사람이 읽기 쉽게 설계된 언어입니다.
- HCL은 JSON보다 50~70% 더 간결하게 표현이 가능합니다.
- JSON은 주석을 지원하지 않으며, 표현이 길어질수록 유지보수가 어려워지는 단점이 있습니다.
HCL 표현식
// 한줄 주석 방법1
# 한줄 주석 방법2

/*
라인
주석
*/

locals {
  key1     = "value1"     # = 를 기준으로 키와 값이 구분되며
  myStr    = "TF ♡ UTF-8" # UTF-8 문자를 지원한다.
  multiStr = <<EOF
  Multi
  Line
  String
  with anytext
EOF

  boolean1    = true   # boolean true
  boolean2    = false  # boolean false를 지원한다.
  deciaml     = 123    # 기본적으로 숫자는 10진수,
  octal       = 0123   # 0으로 시작하는 숫자는 8진수,
  hexadecimal = "0xD5" # 0x 값을 포함하는 스트링은 16진수,
  scientific  = 1e10   # 과학표기 법도 지원한다.

  # funtion 호출 예
  myprojectname = format("%s is myproject name", var.project)

  # 3항 연산자 조건문을 지원한다.
  credentials = var.credentials == "" ? file(var.credentials_file) : var.credentials
}
HCL은 다양한 주석 방식, 자료형, 함수, 조건문 등을 제공하며 프로그래밍적인 유연성을 갖추고 있습니다.
Terraform에서 사용하는 주요 선언 블록에는 terraform, resource, data, variable, local, output 등이 있습니다.
Terraform 블록
Terraform 블록은 Terraform의 설정을 정의하는 핵심 요소입니다.
Terraform 버전, 프로바이더 버전, 원격 실행 정보, 백엔드 저장소 설정 등을 선언하는 역할을 합니다.
Terraform 블록의 역할과 필요성
- Terraform 및 프로바이더 버전 관리
- Terraform과 프로바이더 버전은 기본적으로 자동 설정되지만, 협업 환경에서는 명시적으로 버전을 선언하는 것이 중요합니다.
- 특정 버전 조건을 지정하면 예상치 못한 실행 오류를 방지할 수 있습니다.
# Terraform 블록 예제
terraform {
  required_version = "~> 1.3.0" # 테라폼 버전

  required_providers { # 프로바이더 버전을 나열
    random = {
      version = ">= 3.0.0, < 3.1.0"
    }
    aws = {
      version = "4.2.0"
    }
  }

  cloud { # Cloud/Enterprise 같은 원격 실행을 위한 정보 [참고: Docs]
    organization = "<MY_ORG_NAME>"
    workspaces {
      name = "my-first-workspace"
    }
  }

  backend "local" { # state를 보관하는 위치를 지정 [참고: Docs, local, remote, s3]
    path = "relative/path/to/terraform.tfstate"
  }
}
Terraform 버전 관리의 필요성
Terraform 블록 내에서 명시적으로 버전을 선언하면, Terraform 자체, 사용되는 모듈, 프로바이더의 동작을 예측 가능하게 만들 수 있습니다.
버전 제약을 설정함으로써 Terraform과 프로바이더, 모듈이 항상 원하는 대로 실행되도록 보장할 수 있습니다.
Terraform은 시맨틱 버전 관리(Semantic Versioning, SemVer) 방식을 따릅니다.
# 버전 체계: Major.Minor.Patch
version = 1.3.4
시맨틱 버전 관리(SemVer) 원칙
| 버전 유형 | 설명 |
| Major 버전 | 내부 동작의 API가 변경 또는 삭제되거나 하위 호환이 되지 않는 버전 |
| Minor 버전 |
신규 기능이 추가되거나 개선되고 하위 호환이 가능한 버전 |
| Patch 버전 |
버그 및 일부 기능이 개선된 하위 호환이 가능한 버전 |
Terraform 버전 제약 방식
Terraform에서 사용하는 버전 제약 방식은 다른 프로그래밍 언어의 종속성 관리 시스템과 유사합니다.
아래와 같은 연산자를 활용하여 특정 버전 조건을 지정할 수 있습니다.
| 연산자 | 설명 |
| = 또는 연산자 없음 | 정확한 버전만 허용 |
| != | 특정 버전을 제외 |
| >, >=, <, <= | 지정된 버전과 비교하여 허용 범위 설정 |
| ~> | 특정 범위 내에서 버전 증가를 허용 |
| ~> x.y | y 버전 내에서만 증가 허용 (1.3.0 ~ 1.3.x 허용) |
| ~> x.y.z | z 버전 내에서만 증가 허용 (1.3.4 ~ 1.3.9 허용) |
Terraform 버전 관리에서 선언 방식의 의미
| 선언된 버전 | 의미 | 고려 사항 |
| 1.0.0 | 테라폼 v1.0.0만을 허용한다. | 테라폼을 업그레이드하기 위해서는 선언된 버전을 변경해야만 한다. |
| >= 1.0.0 | 테라폼 v1.0.0 이상의 모든 버전을 허용한다. | v1.0.0 버전을 포함해 그 이상의 모든 버전을 허용해 실행된다. |
| ~> 1.0.0. | 테라폼 v1.0.0을 포함한 v1.0.x 버전을 허용하고 v1.x는 허용하지 않는다. | 부버전에 대한 업데이트는 무중단으로 이루어진다. |
| >= 1.0, < 2.0.0 | 테라폼 v1.0.0 이상 v2.0.0 미만인 버전을 허용한다. | 주버전에 대한 업데이트를 방지한다. |
Terraform 버전 실습
# 현재 버전 정보 확인
terraform version
Terraform v1.10.2
# terraform 블럭 추가
terraform {
required_version = "< 1.0.0"
}
resource "local_file" "abc" {
content = "abc!"
filename = "${path.module}/abc.txt"
}# 실행 결과 확인
terraform init
...
이 에러는 Terraform 설정 파일에서 1.0.0 미만의 버전만 허용한다고 제한해두었는데 현재 사용 중인 Terraform 버전이 1.10.2로 조건을 넘어서기 때문에 발생하였습니다.
# terraform 블럭 다시 수정
terraform {
  required_version = ">= 1.0.0"
}

resource "local_file" "abc" {
  content  = "abc!"
  filename = "${path.module}/abc.txt"
}
terraform 블럭을 다시 수정하고 terraform init 실행하면

프로바이더 버전
Terraform 0.13 이전에는 프로바이더 버전 정보를 provider 블록 안에 직접 작성했으나 0.13부터는 프로바이더 버전과 소스를 terraform 블록의 required_providers 안에 따로 정의하도록 방식이 바뀌었습니다.
| v0.13 이전 | v0.13 부터 적용 |
| provider "aws" { version = "~> 4.2.0" region = "ap-northeast-2" } provider "azurerm" { version = ">= 2.99.0" features {} } |
terraform { required_providers { aws = { source = "hashicorp/aws" version = "~> 4.2.0" } azurerm = { source = "hashicorp/azurerm" version = ">= 2.99.0" } } } |
Terraform 공식 레지스트리에 접속하면 사용하고자 하는 프로바이더 페이지에서 우측 상단 [USE PROVIDER] 버튼을 클릭하면 해당 프로바이더의 최신 버전과 코드 샘플을 복사해서 사용할 수 있습니다.

# 코드 파일 수정 : 프로바이더 버전을 과하게 높게 설정
terraform {
  required_version = ">= 1.0.0"
  required_providers {
    local = {
      source  = "hashicorp/local"
      version = ">=10000.0.0"
    }
  }
}

resource "local_file" "abc" {
  content  = "123!"
  filename = "${path.module}/abc.txt"
}
이 에러는 required_providers에서 설정한 local 프로바이더 버전 조건이 ">= 10000.0.0"으로 너무 높게 지정되어 Terraform Registry에 존재하는 어떤 버전과도 일치하지 않기 때문에 발생한 것입니다.
# 코드 파일 수정 : local 프로바이더 버전을 >= 2.0.0으로 수정
terraform {
  required_version = ">= 1.0.0"
  required_providers {
    local = {
      source  = "hashicorp/local"
      version = ">= 2.0.0"
    }
  }
}

resource "local_file" "abc" {
  content  = "123!"
  filename = "${path.module}/abc.txt"
}
Cloud 블록
Terraform Cloud 및 Terraform Enterprise는 CLI, VCS, API 기반의 실행 방식을 지원하며, 이를 설정하기 위해 cloud 블록을 사용합니다.
이 블록은 Terraform 1.1 버전부터 새롭게 도입된 구성 방식이며 그 이전에는 상태 파일 저장을 위해 backend 블록의 remote 항목을 사용했습니다.
cloud 블록에서 hostname 속성은 기본값으로 app.terraform.io를 사용하며 Terraform Cloud의 공식 URL입니다.(참고)
| v1.1 이전 | v1.1 이후 |
| terraform { backend "remote" { hostname = "app.terraform.io" organization = "my-org" workspades = { name = "my-app-prod" } } } |
terraform { cloud { hostname = "app.terraform.io" organization = "my-org" workspades = { name = "my-app-prod" } } } |
백엔드 블록
- 백엔드 블록은 Terraform 실행 시 생성되는 **State(상태 파일)**의 저장 위치를 정의하는 구성 요소입니다.
- 기본적으로는 local 백엔드가 사용되며, 상태 파일은 사용자의 로컬 환경에 저장됩니다.
- 하나의 Terraform 설정 내에서는 오직 하나의 백엔드만 구성할 수 있습니다.
- Terraform은 상태 파일에 저장된 데이터를 기반으로 코드로 정의된 리소스를 탐색하고 추적합니다.
- 여러 사용자가 함께 인프라를 관리하는 환경에서는 AWS S3, Terraform Cloud와 같은 외부 백엔드 저장소를 구성하여 상태 파일을 공유하는 것이 필요합니다.
- 상태 파일에는 비밀번호, 인증서 등의 민감한 정보가 포함될 수 있으므로 접근 제어와 안전한 관리 방안을 함께 마련하는 것이 중요합니다.
State 잠금 동작
- 기본적으로 활성화되는 백엔드는 local이며, 상태 파일은 로컬 환경에서 저장되고 관리됩니다.
- 외부 백엔드를 사용하는 경우에는 동시에 여러 사용자가 상태 파일에 접근할 수 있기 때문에 Terraform은 작업 중 .terraforhttp://m.tfstate.lock.info 잠금 파일을 생성하여 상태 파일을 보호합니다.
- 해당 잠금 기능은 Terraform이 실행되는 동안 상태 파일의 충돌을 방지하고 일관성을 유지하기 위한 기능입니다.
- 잠금 파일이 실제로 생성되는 과정을 확인하려면, 코드 일부를 수정한 뒤 terraform apply 명령어를 실행하면 됩니다.생성된 잠금 파일은 다음과 같은 정보를 포함합니다.
ID:        214da120-941d-5309-e4c2-cca046c70e21
Path:      terraform.tfstate	# 잠긴 state 파일의 위치
Operation: OperationTypeApply	# 어떤 동작으로 인해 해당 잠금 파일이 생성되었는지 명기
Who:       root@*****			# 작업자 정보
Version:   1.10.2				# 실행한 테라폼 버전
Created:   2025-03-22 14:16:56.156117774 +0000 UTC
Info:
잠금 파일이 테라폼 실행에 어떤 영향을 주는지 확인해보기
# 코드 파일 수정 : content 내용을 수정
resource "local_file" "abc" {
  content  = "123456!"
  filename = "${path.module}/abc.txt"
}
# 터미널1
terraform apply
...
Enter a value: 대기
# 터미널2
terraform apply
...
ls -al #.terraform.tfstate.lock.info 파일 없음 확인
# 터미널2: 정보확인
cat .terraform.tfstate.lock.info | jq .# 터미널1 취소 후 apply
terraform apply -auto-approve
백엔드 설정 변경
# 현재 State 파일 정보 확인
ls terraform.tfstate*
terraform.tfstate        terraform.tfstate.backup

# 리소스 확인
terraform state list

# State 파일 정보 확인
cat terraform.tfstate
백엔드가 설정되면 다시 init 명령을 수행해 State의 위치를 재설정해야 합니다.
백엔드 블록에 local을 정의해 'terraform init'을 수행해봅니다.
terraform {
  backend "local" {
    path = "state/terraform.tfstate"
  }
}

resource "local_file" "abc" {
  content  = "123456!"
  filename = "${path.module}/abc.txt"
}
# init 시 백엔드 변경에 따른 마이그레이션 안내
terraform init
...
Enter a value: yes
...
#
ls terraform.tfstate*
tree state
cat state/terraform.tfstate | jq
cat state/terraform.tfstate | jq -r .serial
#
terraform apply -auto-approve
terraform init 실행 시 백엔드 구성이 변경되면 Terraform은 기존 상태 파일을 새로운 백엔드로 마이그레이션할지 여부를 안내하고 사용자의 선택을 요청합니다.
이때 yes를 입력하면 기존 상태 파일이 새 백엔드로 복사되어 그대로 이어서 작업할 수 있도록 설정이 완료됩니다.
초기화가 성공적으로 마무리되면 Terraform은 새 백엔드를 기준으로 상태를 관리하게 됩니다.
AWS Fargate
AWS Fargate는 컨테이너를 서버를 직접 관리하지 않고 실행할 수 있게 해주는 서버리스 컴퓨팅 엔진입니다.
EKS와 함께 사용할 경우, EC2 기반의 노드 없이 Pod를 실행할 수 있습니다.

Fargate Profile은 파드가 실행될 서브넷, 네임스페이스, 레이블 조건을 기준으로, 해당 조건을 만족하는 파드가 Fargate에서 자동 실행되도록 설정합니다.

EKS에서는 Fargate Profile의 조건(네임스페이스, 레이블 등)에 따라 Webhook이 작동하고 Fargate 전용 스케줄러가 Pod를 Fargate에서 실행하도록 결정합니다.. 이 구조를 통해 EC2 기반 노드와는 별개로 서버리스 방식의 Pod 실행이 가능합니다.


AWS는 Fargate의 Data Plane에서 컨테이너를 실행할 때 Firecracker MicroVM 위에서 각 컨테이너(Pod)를 실행합니다. 즉, Fargate의 파드는 Firecracker 위에서 돌아갑니다.
Firecracker 개요
Firecracker는 AWS에서 개발한 경량 가상화 기술로 KVM(Kernel-based Virtual Machine)을 기반으로 하여 보안성과 리소스 효율성을 모두 제공하는 MicroVM(Micro Virtual Machine)을 실행합니다. 이 기술은 AWS Lambda와 AWS Fargate에서 실서비스에 이미 사용되고 있습니다.

Firecracker의 주요 특징
- 고속 부팅과 경량화
- Firecracker는 1초도 되지 않는 시간 안에 MicroVM을 시작할 수 있으며, 약 125ms 이내 부팅이 가능합니다. 메모리 사용량은 MicroVM당 약 5MiB 수준으로, 하나의 호스트 인스턴스에서 수천 개의 MicroVM을 동시에 실행할 수 있습니다.
- 강화된 보안
- Firecracker는 최소한의 장치 모델과 제한된 시스템 호출을 사용하는 구조를 통해 공격 표면을 최소화합니다.
- 또한 Jailer라는 격리 메커니즘을 통해 각 프로세스를 cgroups와 seccomp 등으로 제한하여 보안성을 강화합니다.
- 단순화된 가상 디바이스
- 게스트 운영체제는 최소한의 가상 디바이스에만 접근할 수 있습니다. 지원되는 디바이스는 네트워크 디바이스, 블록 스토리지, KVM 클럭, 직렬 콘솔 등으로 제한되어 있습니다. 이로 인해 성능과 보안 측면에서 유리합니다.
- 오픈 소스와 커뮤니티
- Firecracker는 오픈 소스로 공개되어 있으며, GitHub를 통해 활발하게 개발되고 있습니다. 누구나 기여할 수 있으며 관련 문서와 예제가 잘 정리되어 있습니다.

Amazon EKS Fargate 제약사항 및 고려사항
- DaemonSet은 Fargate에서 지원되지 않으며 애플리케이션에 데몬이 필요한 경우 Pod 내 사이드카 컨테이너로 실행해야 합니다.
- 특권 컨테이너(Privileged containers)는 지원되지 않습니다.
- HostPort 및 HostNetwork 설정은 사용할 수 없습니다.
- GPU를 사용할 수 없습니다.
- Arm 기반 프로세서를 요구하는 워크로드는 실행할 수 없습니다.
- 노드에 SSH로 접속하는 것은 지원되지 않습니다.
- Fargate에서 실행되는 Pod는 인터넷 액세스를 위해 NAT 게이트웨이가 연결된 프라이빗 서브넷에서만 동작해야 합니다.
- Amazon EC2 인스턴스 메타데이터 서비스 IMDS를 사용할 수 없습니다.
- 대체 CNI 플러그인을 사용할 수 없습니다.
- EFS 동적 영구 볼륨 프로비저닝은 지원되지 않으며 정적으로 수동 마운트만 가능합니다.
- Amazon EBS 볼륨을 Pod에 마운트할 수 없습니다.
- Fargate Spot 기능은 지원되지 않습니다.
- Kubernetes의 topology spread constraints는 사용할 수 없습니다.
- Amazon EC2 전용 호스트에서 컨테이너를 실행하는 기능은 지원되지 않습니다.
- AWS Bottlerocket 운영체제는 지원되지 않습니다.
- Fargate에서 실행되는 Pod는 Guaranteed 우선순위로 실행되므로 모든 컨테이너는 CPU와 메모리의 요청값과 제한값이 동일해야 합니다.
- 각 Pod는 Kubernetes 구성 요소 kubelet kube proxy containerd 등에 대해 추가로 256 MiB의 메모리를 예약합니다.
- 기본적으로 각 Pod는 20 GiB의 임시 저장소를 제공하며 최대 175 GiB까지 확장할 수 있습니다.
- Fargate는 Fluent Bit 기반의 내장 로그 라우터를 제공하므로 별도의 사이드카로 Fluent Bit을 실행할 필요는 없습니다.
Terraform으로 실습 환경 배포 : EKS, Fargate Profile
# 코드 가져오기
git clone https://github.com/aws-ia/terraform-aws-eks-blueprints
tree terraform-aws-eks-blueprints/patterns
cd terraform-aws-eks-blueprints/patterns/fargate-serverless
# init 초기화
terraform init
tree .terraform
cat .terraform/modules/modules.json | jq
tree .terraform/providers/registry.terraform.io/hashicorp -L 2
# plan
terraform planmain.tf 수정 : 리전 등 일부 실습 편리를 위해 수정, Sample App 배포 부분 삭제
# 배포 : EKS, Add-ons, fargate profile - 13분 소요
terraform apply -auto-approve
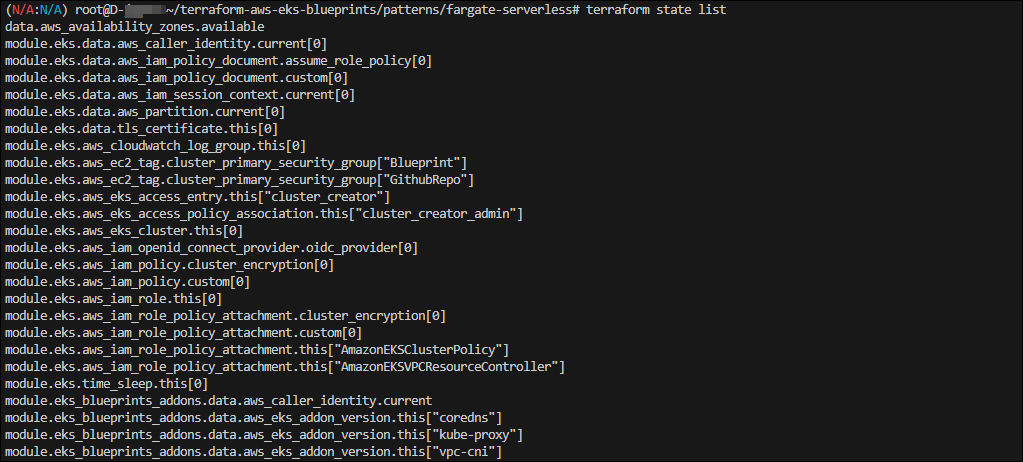
# 배포 완료 후 확인
terraform state list
module.eks.data.aws_caller_identity.current
...
terraform output
...
# EKS 자격증명
$(terraform output -raw configure_kubectl) # aws eks --region ap-northeast-2 update-kubeconfig --name fargate-serverless
cat ~/.kube/config
# kubectl context 변경
kubectl ctx
kubectl config rename-context "arn:aws:eks:ap-northeast-2:$(aws sts get-caller-identity --query 'Account' --output text):cluster/fargate-serverless" "fargate-lab"
# k8s 노드, Pod 정보 확인
kubectl ns default
kubectl cluster-info
kubectl get node
kubectl get pod -A
# 상세 정보 확인
terraform show
...
terraform state list
terraform state show 'module.eks.aws_eks_cluster.this[0]'
terraform state show 'module.eks.data.tls_certificate.this[0]'
terraform state show 'module.eks.aws_cloudwatch_log_group.this[0]'
terraform state show 'module.eks.aws_eks_access_entry.this["cluster_creator"]'
terraform state show 'module.eks.aws_iam_openid_connect_provider.oidc_provider[0]'
terraform state show 'module.eks.data.aws_partition.current'
terraform state show 'module.eks.aws_iam_policy.cluster_encryption[0]'
terraform state show 'module.eks.aws_iam_role.this[0]'
terraform state show 'module.eks.time_sleep.this[0]'
terraform state show 'module.eks.module.kms.aws_kms_key.this[0]'
terraform state show 'module.eks.module.fargate_profile["kube_system"].aws_eks_fargate_profile.this[0]'
...
기본 정보 확인
# k8s api service 확인 : ENDPOINTS 의 IP는 EKS Owned-ENI 2개
kubectl get svc,ep

# node 확인 : 노드(Micro VM) 4대
kubectl get csr
kubectl get node -owide
kubectl describe node | grep eks.amazonaws.com/compute-type

# 파드 확인 : 파드의 IP와 노드의 IP가 같다!
kubectl get pdb -n kube-system
kubectl get pod -A -owide

# aws-load-balancer-webhook-service , eks-extension-metrics-api?
kubectl get svc,ep -n kube-system

# eks-extension-metrics-api?
kubectl get apiservices.apiregistration.k8s.io | grep eks
v1.metrics.eks.amazonaws.com           kube-system/eks-extension-metrics-api   True        53m

kubectl get --raw "/apis/metrics.eks.amazonaws.com" | jq
kubectl get --raw "/apis/metrics.eks.amazonaws.com/v1" | jq

# configmap 확인
kubectl get cm -n kube-system

# aws-auth 보다 우선해서 IAM access entry 가 있음을 참고.
# 기본 관리노드 보다 system:node-proxier 그룹이 추가되어 있음.
# fargate profile 이 2개인데, 그 profile 갯수만큼 있음.
kubectl get cm -n kube-system aws-auth -o yaml

#
kubectl rbac-tool lookup system:node-proxier
kubectl rolesum -k Group system:node-proxier

#
kubectl get cm -n kube-system amazon-vpc-cni -o yaml

# coredns 설정 내용
kubectl get cm -n kube-system coredns -o yaml

# 인증서 작성되어 있음 : client-ca-file , requestheader-client-ca-file
kubectl get cm -n kube-system extension-apiserver-authentication -o yaml

#
kubectl get cm -n kube-system kube-proxy -o yaml
kubectl get cm -n kube-system kube-proxy-config -o yaml


# coredns Pod 상세 정보 확인
kubectl get pod -n kube-system -l k8s-app=kube-dns -o yaml


fargate 에 kube-ops-view
# helm 배포
helm repo add geek-cookbook https://geek-cookbook.github.io/charts/
helm install kube-ops-view geek-cookbook/kube-ops-view --version 1.2.2 --set env.TZ="Asia/Seoul" --namespace kube-system

# 포트 포워딩
kubectl port-forward deployment/kube-ops-view -n kube-system 8080:8080 &

# 접속 주소 확인 : 각각 1배, 1.5배, 3배 크기
echo -e "KUBE-OPS-VIEW URL = http://localhost:8080"
echo -e "KUBE-OPS-VIEW URL = http://localhost:8080/#scale=1.5"
echo -e "KUBE-OPS-VIEW URL = http://localhost:8080/#scale=3"

# Windows
웹브라우저 > "http://127.0.0.1:8080/#scale=1.5"
# macOS
open "http://127.0.0.1:8080/#scale=1.5"
# node 확인 : 노드(Micro VM)
kubectl get csr
kubectl get node -owide
kubectl describe node | grep eks.amazonaws.com/compute-type
# kube-ops-view 디플로이먼트/파드 상세 정보 확인
kubectl get pod -n kube-system
kubectl get pod -n kube-system -o jsonpath='{.items[0].metadata.annotations.CapacityProvisioned}'
kubectl get pod -n kube-system -l app.kubernetes.io/instance=kube-ops-view -o jsonpath='{.items[0].metadata.annotations.CapacityProvisioned}'
# 디플로이먼트 상세 정보
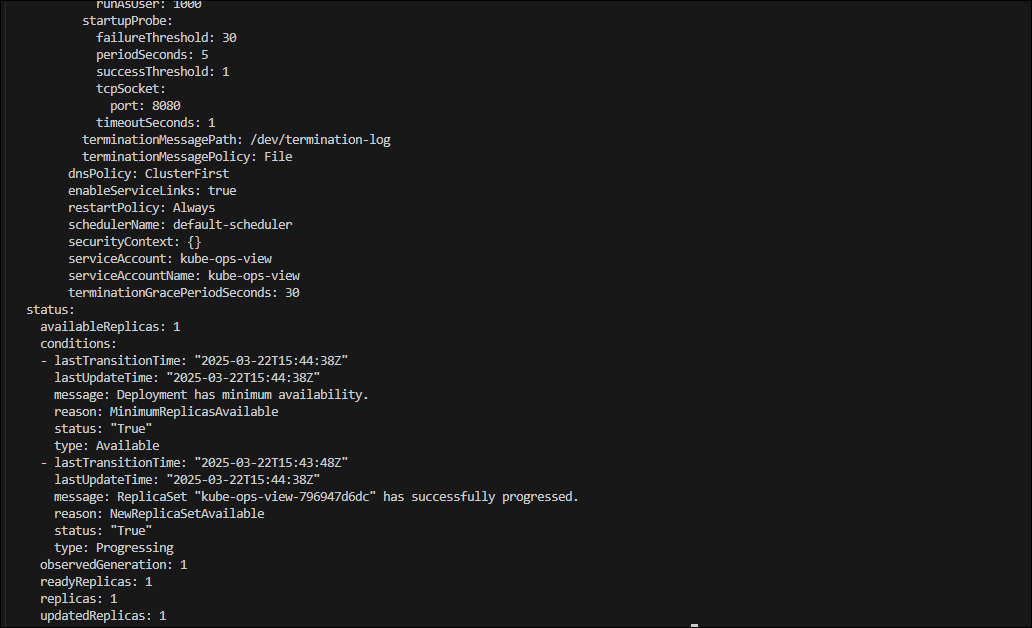
kubectl get deploy -n kube-system kube-ops-view -o yaml
# Pod 상세 정보 : admission control 이 동작했음을 알 수 있음
kubectl get pod -n kube-system -l app.kubernetes.io/instance=kube-ops-view -o yaml

fargate 에 netshoot 디플로이먼트(Pod)
Fargate에서는 Pod 단위로 vCPU와 메모리를 지정해야 하며 이 두 리소스는 자유롭게 아무 값이나 지정할 수 있는 것이 아니라 사전 정의된 조합 중에서만 선택 가능합니다.
| vCPU 수 | 허용 가능한 메모리 값 |
| 0.25 vCPU | 0.5 GB, 1 GB, 2 GB |
| 0.5 vCPU | 1~4 GB (1GB 단위 증가) |
| 1 vCPU | 2~8 GB (1GB 단위 증가) |
| 2 vCPU | 4~16 GB (1GB 단위 증가) |
| 4 vCPU | 8~30 GB (1GB 단위 증가) |
| 8 vCPU | 16~60 GB (4GB 단위 증가) |
| 16 vCPU | 32~120 GB (8GB 단위 증가) |
# 네임스페이스 생성
kubectl create ns study-aews
# 테스트용 파드 netshoot 디플로이먼트 생성 : 0.5vCPU 1GB 할당되어, 아래 Limit 값은 의미가 없음. 배포 시 대략 시간 측정해보자!
cat <<EOF | kubectl apply -f -
apiVersion: apps/v1
kind: Deployment
metadata:
name: netshoot
namespace: study-aews
spec:
replicas: 1
selector:
matchLabels:
app: netshoot
template:
metadata:
labels:
app: netshoot
spec:
containers:
- name: netshoot
image: nicolaka/netshoot
command: ["tail"]
args: ["-f", "/dev/null"]
resources:
requests:
cpu: 500m
memory: 500Mi
limits:
cpu: 2
memory: 2Gi
terminationGracePeriodSeconds: 0
EOF# 이벤트(Event)를 실시간으로 모니터링
kubectl get events -w --sort-by '.lastTimestamp'# 확인 : 메모리 할당 측정은 어떻게 되었는지?
kubectl get pod -n study-aews -o wide
kubectl get pod -n study-aews -o jsonpath='{.items[0].metadata.annotations.CapacityProvisioned}'
# 디플로이먼트 상세 정보
kubectl get deploy -n study-aews netshoot -o yaml
# Pod 상세 정보 : admission control 이 동작했음을 알 수 있음
kubectl get pod -n study-aews -l app=netshoot -o yaml
#
kubectl describe pod -n study-aews -l app=netshoot | grep Events: -A10
#
kubectl get mutatingwebhookconfigurations.admissionregistration.k8s.io
kubectl describe mutatingwebhookconfigurations 0500-amazon-eks-fargate-mutation.amazonaws.com
kubectl get validatingwebhookconfigurations.admissionregistration.k8s.io
# Pod 내부에 zsh 접속 후 확인
kubectl exec -it deploy/netshoot -n study-aews -- zsh


파드 권한과 호스트 네임스페이스 공유로 호스트 탈취 시도
# 테스트 Pod 배포
kubectl apply -f - <<EOF
apiVersion: v1
kind: Pod
metadata:
  name: root-shell
  namespace: study-aews
spec:
  containers:
  - command:
    - /bin/cat
    image: alpine:3
    name: root-shell
    securityContext:
      privileged: true
    tty: true
    stdin: true
    volumeMounts:
    - mountPath: /host
      name: hostroot
  hostNetwork: true
  hostPID: true
  hostIPC: true
  tolerations:
  - effect: NoSchedule
    operator: Exists
  - effect: NoExecute
    operator: Exists
  volumes:
  - hostPath:
      path: /
    name: hostroot
EOF
#
kubectl get pod -n study-aews root-shell
kubectl describe pod -n study-aews root-shell | grep Events: -A 10
# 출력 메시지
# Pod not supported on Fargate: fields not supported:
# HostNetwork, HostPID, HostIPC, volumes not supported:
# hostroot is of an unsupported volume Type, invalid SecurityContext fields: Privileged
# 삭제
kubectl delete pod -n study-aews root-shell
# (참고) fargate가 아닌 권한이 충분한 곳에서 실행 시 : 아래 처럼 호스트 네임스페이스로 진입 가능!
kubectl -n kube-system exec -it root-shell -- chroot /host /bin/bash
Fagate Ingress
# 게임 디플로이먼트와 Service, Ingress 배포
cat <<EOF | kubectl apply -f -
apiVersion: apps/v1
kind: Deployment
metadata:
  namespace: study-aews
  name: deployment-2048
spec:
  selector:
    matchLabels:
      app.kubernetes.io/name: app-2048
  replicas: 2
  template:
    metadata:
      labels:
        app.kubernetes.io/name: app-2048
    spec:
      containers:
      - image: public.ecr.aws/l6m2t8p7/docker-2048:latest
        imagePullPolicy: Always
        name: app-2048
        ports:
        - containerPort: 80
---
apiVersion: v1
kind: Service
metadata:
  namespace: study-aews
  name: service-2048
spec:
  ports:
    - port: 80
      targetPort: 80
      protocol: TCP
  type: ClusterIP
  selector:
    app.kubernetes.io/name: app-2048
---
apiVersion: networking.k8s.io/v1
kind: Ingress
metadata:
  namespace: study-aews
  name: ingress-2048
  annotations:
    alb.ingress.kubernetes.io/scheme: internet-facing
    alb.ingress.kubernetes.io/target-type: ip
spec:
  ingressClassName: alb
  rules:
    - http:
        paths:
        - path: /
          pathType: Prefix
          backend:
            service:
              name: service-2048
              port:
                number: 80
EOF
# 생성 확인
kubectl get-all -n study-aews
kubectl get ingress,svc,ep,pod -n study-aews
kubectl get targetgroupbindings -n study-aews
# Ingress 확인
kubectl describe ingress -n study-aews ingress-2048
kubectl get ingress -n study-aews ingress-2048 -o jsonpath="{.status.loadBalancer.ingress[*].hostname}{'\n'}"

# 게임 접속 : ALB 주소로 웹 접속
kubectl get ingress -n study-aews ingress-2048 -o jsonpath='{.status.loadBalancer.ingress[0].hostname}' | awk '{ print "Game URL = http://"$1 }'
# Pod IP 확인
kubectl get pod -n study-aews -owide
# Pod 증가
kubectl scale deployment -n study-aews deployment-2048 --replicas 4
# 게임 실습 리소스  삭제
kubectl delete ingress ingress-2048 -n study-aews
kubectl delete svc service-2048 -n study-aews && kubectl delete deploy deployment-2048 -n study-aews
Fargate Job
# 테스트 Job 배포
cat <<EOF | kubectl apply -f -
apiVersion: batch/v1
kind: Job
metadata:
  name: busybox1
  namespace: study-aews
spec:
  template:
    spec:
      containers:
      - name: busybox
        image: busybox
        command: ["/bin/sh", "-c", "sleep 10"]
      restartPolicy: Never
  ttlSecondsAfterFinished: 60 # <-- TTL controller
---
apiVersion: batch/v1
kind: Job
metadata:
  name: busybox2
  namespace: study-aews
spec:
  template:
    spec:
      containers:
      - name: busybox
        image: busybox
        command: ["/bin/sh", "-c", "sleep 10"]
      restartPolicy: Never
EOF
# 확인
kubectl get job,pod -n study-aews
kubectl get job -n study-aews -w
kubectl get pod -n study-aews -w
kubectl get job,pod -n study-aews
# 삭제
kubectl delete job -n study-aews --all
Fargate Logging
Fargate의 Amazon EKS는 Fluent Bit 기반의 내장 로그 라우터를 제공합니다.
즉, Fluent Bit 컨테이너를 사이드카로 명시적으로 실행하지 않아도 되고 Amazon이 대신 실행하며 사용자는 로그 라우터 구성을 제공하기만 하면 됩니다.
▶ 로그 라우터 구성 방식
- 구성은 전용 ConfigMap을 통해 이루어집니다.
- ConfigMap의 조건은 다음과 같습니다.
- 이름은 aws-logging이어야 합니다.
- 네임스페이스는 aws-observability여야 합니다.
- 전체 크기는 5300자 이하여야 합니다.
- ConfigMap을 생성하면 Amazon EKS on Fargate가 이를 자동으로 감지하고 로그 라우터를 구성합니다.
- 사용되는 Fluent Bit은 AWS에서 관리하는 Fluent Bit용 AWS 배포판이며 Fluent Bit의 업스트림과 호환됩니다.
- 자세한 정보는 GitHub의 AWS for Fluent Bit 문서를 참고할 수 있습니다
▶ 로그 대상과 통합
Fargate 로그 라우터는 다음과 같은 AWS 서비스로 로그를 직접 전송할 수 있습니다
- Amazon CloudWatch
- Amazon OpenSearch Service
- Amazon Kinesis Data Firehose를 통해 다음 대상에 전달 가능
- Amazon S3
- Amazon Kinesis Data Streams
- 서드파티 파트너 도구 등
# 로그 발생 nginx 배포
cat <<EOF | kubectl apply -f -
apiVersion: apps/v1
kind: Deployment
metadata:
  name: sample-app
  namespace: study-aews
spec:
  replicas: 2
  selector:
    matchLabels:
      app: nginx
  template:
    metadata:
      labels:
        app: nginx
    spec:
      containers:
      - image: nginx:latest
        name: nginx
        ports:
        - containerPort: 80
          name: http
        resources:
          requests:
            cpu: 500m
            memory: 500Mi
          limits:
            cpu: 2
            memory: 2Gi
---
apiVersion: v1
kind: Service
metadata:
  name: sample-app
  namespace: study-aews
spec:
  selector:
    app: nginx
  ports:
  - port: 80
    targetPort: 80
    protocol: TCP
  type: ClusterIP
EOF
# 확인
kubectl get pod -n study-aews -l app=nginx
kubectl describe pod -n study-aews -l app=nginx
# 반복 접속
kubectl exec -it deploy/netshoot -n study-aews -- curl sample-app | grep title
while true; do kubectl exec -it deploy/netshoot -n study-aews -- curl sample-app | grep title; sleep 1; echo ; date; done;
# 로그 확인
kubectl stern -n study-aews -l app=nginx

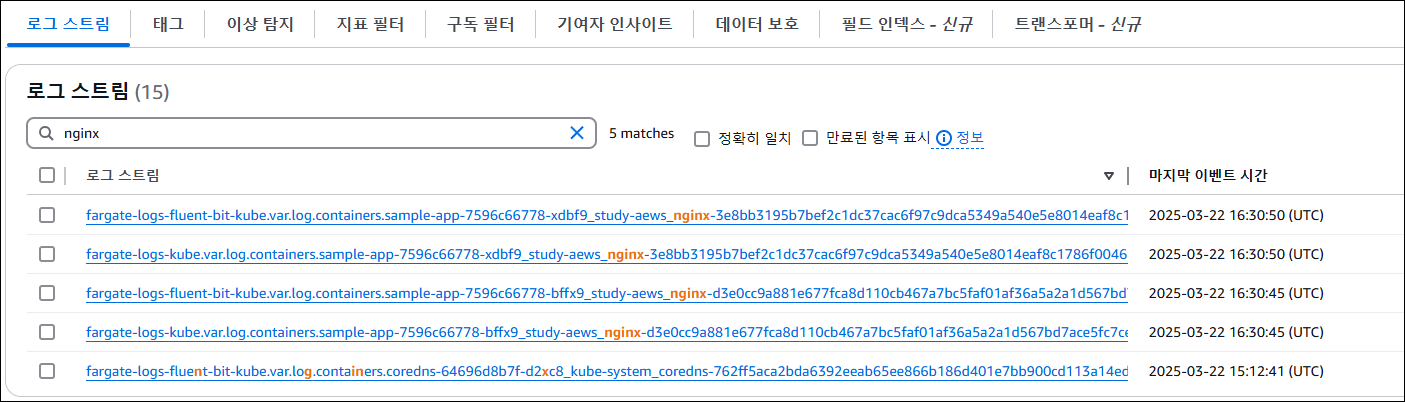

로그 설정 정보 확인
# main.tf
...
  # Enable Fargate logging this may generate a large ammount of logs, disable it if not explicitly required
  enable_fargate_fluentbit = true
  fargate_fluentbit = {
    flb_log_cw = true
  }
...

# aws-observability라는 이름의 전용 네임스페이스 확인
kubectl get ns --show-labels

# Fluent Conf 데이터 값이 포함된 ConfigMap : 컨테이너 로그를 목적지로 배송 설정
## Amazon EKS Fargate 로깅은 ConfigMap의 동적 구성을 지원하지 않습니다.
## ConfigMap에 대한 모든 변경 사항은 새 포드에만 적용됩니다. 기존 포드에는 변경 사항이 적용되지 않습니다.
kubectl get cm -n aws-observability
kubectl get cm -n aws-observability aws-logging -o yaml

EKS Auto Mode
EKS Automode는 Amazon EKS에서 제공하는 새로운 클러스터 운영 모드로 Kubernetes 인프라의 대부분을 자동으로 관리해주는 기능입니다. 사용자는 클러스터와 워커 노드를 직접 관리하지 않아도 됩니다. 애플리케이션 배포와 운영에만 집중할 수 있도록 도와줍니다.

주요 특징
- 자동 노드 프로비저닝 사용자가 파드만 정의하면 EKS가 자동으로 필요한 노드를 생성하고 관리합니다.
- 자동 확장 파드 수나 리소스 요청에 따라 노드를 자동으로 늘리거나 줄입니다.
- 노드 운영체제와 보안 자동 관리 운영체제 업데이트나 보안 패치가 자동으로 적용됩니다.
- Karpenter나 Managed Node Group 필요 없음 별도의 노드 그룹이나 노드 프로비저너를 설정하지 않아도 됩니다.
- Fargate와의 차이점 Fargate는 파드 단위의 서버리스 환경을 제공하지만 Automode는 실제 노드를 자동으로 관리합니다. 따라서 일반적인 Kubernetes 사용 방식과 더 유사합니다.
제약사항 및 고려사항
- 핵심 구성 요소 실행 방식
- EKS Automode에서 사용하는 노드는 주요 구성 요소를 파드로 실행하지 않고 systemd 기반의 데몬으로 실행합니다.
- 실행되는 대표적인 프로세스는 다음과 같습니다.
- kubelet, kube-proxy, eks-pod-identity-agent, eks-node-monitor-agent, eks-healthcheck, eks-ebs-csi-driver,csi-node-driver-registrar, coredns, containerd, aws-network-policy-agent, apiserver, ipam
- 노드 이미지 특성
- EKS Automode는 변경할 수 없는 AMI를 사용합니다.
- 이 AMI는 SELinux 강제 모드를 활성화하고 루트 파일 시스템을 읽기 전용으로 설정하여 보안을 강화합니다.
- 해당 노드의 수명은 최대 21일로 제한됩니다.
- 노드 접근 제한
- 보안을 위해 SSH 또는 SSM을 통한 노드 접근이 차단되어 있습니다.
- 사용자는 노드 내부에 직접 접속하거나 소프트웨어를 설치할 수 없습니다.
- 자동 업그레이드
- Kubernetes 클러스터 및 관련 구성 요소는 자동으로 최신 상태로 유지됩니다.
- 이 과정에서 Pod Disruption Budget이나 NodePool Disruption Budget 설정을 고려합니다.
- 단, 21일 이상 동안 파드가 업데이트되지 못하는 경우 수동 조치가 필요할 수 있습니다.
- 자동으로 관리되는 기능
- Pod IP 주소 할당, 네트워크 정책, 로컬 DNS, GPU 지원, 헬스 체크 기능, EBS CSI 스토리지 등 Kubernetes 및 AWS 기능이 자동으로 관리됩니다.
- 노드 사양 및 제한
- 노드는 ephemeral 스토리지를 80GiB 사용하며, 노드당 최대 110개의 파드를 실행할 수 있습니다.
- 노드풀 설정
- 기본 노드풀은 활성화 또는 비활성화가 가능하며, disruption budget 설정을 통해 중단을 제어할 수 있습니다.
- Ingress 설정
- IngressClassParams를 통해 Ingress 구성이 가능하나 일부 API가 변경되거나 지원되지 않는 기능이 있을 수 있습니다.
- 스토리지 클래스
- EBS를 사용하는 경우 프로비저너는 ebs.csi.eks.amazonaws.com으로 설정되며, 성능 지표는 Prometheus에서 제공되지 않습니다.
- Kubernetes 버전 업그레이드
- 업그레이드 시 사용자가 직접 설치한 애드온은 사용자 책임 하에 관리해야 합니다.
- 기본 제공 노드풀
- system 및 general-purpose 용도의 노드풀이 제공되며 amd64와 arm64 아키텍처를 지원합니다.
- 중요 애드온 실행 방식
- Core 애드온은 전용 인스턴스에서 실행되며 system 노드풀에서 동작합니다.
- 이는 일반 워크로드와 분리되어 안정성을 보장합니다.
- 혼합 모드 사용 시 주의사항
- EKS Automode와 기존 EKS 모드를 함께 사용하는 경우 어떤 노드에서 파드가 실행될지 명확히 설정해야 합니다.
- AWS에서 관리하는 인스턴스
- EKS Automode에서 사용하는 EC2 인스턴스는 AWS가 소유하고 관리합니다.
- 운영체제나 Kubernetes 구성요소도 AWS에서 책임지며, 사용자는 이를 직접 수정할 수 없습니다.
- 지원 인스턴스 유형
- vCPU가 1개 이상인 인스턴스만 사용 가능하며 nano, micro, small 타입은 지원되지 않습니다.
- NVMe 스토리지 자동 구성
- 지원되는 인스턴스에서 NVMe 스토리지가 자동으로 포맷되고 구성됩니다.
- RAID 0 설정도 자동으로 처리되어 수동 작업이 필요 없습니다.
- Neuron 디바이스 플러그인
- EKS Automode에서는 Neuron 디바이스 플러그인을 따로 설치할 필요가 없습니다.
- IAM 역할 구성
- Cluster IAM Role, Node IAM Role, Service-linked Role을 설정해야 하며 이에 대한 문서를 참고하는 것이 좋습니다.
- 네트워킹 제한
- 일부 VPC CNI 기능은 지원되지 않으므로 공식 문서를 통해 확인이 필요합니다.
- 문제 해결 도구
- NodeDiagnostic 리소스를 사용하여 노드 로그를 조회
- EC2 CLI를 통해 콘솔 출력 가져오기
- 디버깅 컨테이너를 활용한 로그 수집
실습
# Terraform 배포
# Get the code : 배포 코드에 addon 내용이 읍다!
git clone https://github.com/aws-samples/sample-aws-eks-auto-mode.git
cd sample-aws-eks-auto-mode/terraform

# eks.tf : "system" 은 '전용인스턴스'로 추가하지 않는다
...
  cluster_compute_config = {
    enabled    = true
    node_pools = ["general-purpose"]
  }
...
# Initialize and apply Terraform
terraform init
terraform plan
terraform apply -auto-approve# kubectl context 변경
kubectl ctx
kubectl config rename-context "arn:aws:eks:ap-northeast-2:$(aws sts get-caller-identity --query 'Account' --output text):cluster/automode-cluster" "automode-lab"
kubectl ns default# 아래 IP의 ENI 찾아보자
kubectl get svc,ep
# Terraform 확인
terraform state list
terraform show
terraform state show 'module.eks.aws_eks_cluster.this[0]'


# crd 확인
kubectl get crd

# api-resources 확인
kubectl api-resources | grep -i node

# 노드에 Access가 불가능하니, 분석 지원(CRD)제공
kubectl explain nodediagnostics

#
kubectl get nodeclasses.eks.amazonaws.com -o yaml

#
kubectl get nodepools

#
kubectl get mutatingwebhookconfiguration
kubectl get validatingwebhookconfiguration

kube-ops-view 설치
# helm 배포
helm repo add geek-cookbook https://geek-cookbook.github.io/charts/
helm install kube-ops-view geek-cookbook/kube-ops-view --version 1.2.2 --set env.TZ="Asia/Seoul" --namespace kube-system
kubectl get events -w --sort-by '.lastTimestamp' # 출력 이벤트 로그 분석해보자
# 확인
kubectl get nodeclaims
# OS, KERNEL, CRI 확인
kubectl get node -owide
# CNI 노드 확인
kubectl get cninodes.eks.amazonaws.com
#[신규 터미널] 포트 포워딩
kubectl port-forward deployment/kube-ops-view -n kube-system 8080:8080 &

# 접속 주소 확인 : 각각 1배, 1.5배, 3배 크기
echo -e "KUBE-OPS-VIEW URL = http://localhost:8080"
echo -e "KUBE-OPS-VIEW URL = http://localhost:8080/#scale=1.5"
echo -e "KUBE-OPS-VIEW URL = http://localhost:8080/#scale=3"

# Windows
웹브라우저 > "http://127.0.0.1:8080/#scale=1.5"

# macOS
open "http://127.0.0.1:8080/#scale=1.5"
# [컴퓨팅] karpenter 동작 실습을 위해 deployment 배포
cat <<EOF | kubectl apply -f -
apiVersion: apps/v1
kind: Deployment
metadata:
  name: inflate
spec:
  replicas: 1
  selector:
    matchLabels:
      app: inflate
  template:
    metadata:
      labels:
        app: inflate
    spec:
      terminationGracePeriodSeconds: 0
      nodeSelector:
        eks.amazonaws.com/compute-type: auto
      securityContext:
        runAsUser: 1000
        runAsGroup: 3000
        fsGroup: 2000
      containers:
        - name: inflate
          image: public.ecr.aws/eks-distro/kubernetes/pause:3.7
          resources:
            requests:
              cpu: 1
          securityContext:
            allowPrivilegeEscalation: false
EOF
# Scale test 1
kubectl scale deployment inflate --replicas 100 && kubectl get events -w --sort-by '.lastTimestamp'
# Scale test 2
kubectl scale deployment inflate --replicas 200 && kubectl get events -w --sort-by '.lastTimestamp'
# Scale test 3
kubectl scale deployment inflate --replicas 50 && kubectl get events -w --sort-by '.lastTimestamp'
[네트워킹] Graviton Workloads (2048 game) 배포 with ingress(ALB) : custom nodeclass/pool 사용
# custom nodeclass/pool, ment 배포
# custom node pool 생성 : 고객 NodePool : Karpenter 와 키가 다르니 주의!
## 기존(karpenter.k8s.aws/instance-family) → 변경(eks.amazonaws.com/instance-family) - Link
ls ../nodepools
cat ../nodepools/graviton-nodepool.yaml
kubectl apply -f ../nodepools/graviton-nodepool.yaml
# 확인
kubectl get NodeClass
kubectl get NodePool
#
ls ../examples/graviton
cat ../examples/graviton/game-2048.yaml
kubectl apply -f ../examples/graviton/game-2048.yaml
#
kubectl get nodeclaims
kubectl get nodeclaims -o yaml
#
kubectl get cninodes.eks.amazonaws.com
kubectl get cninodes.eks.amazonaws.com -o yaml
eks-node-viewer --resources cpu,memory
kubectl get node -owide
kubectl describe nod
#
kubectl get deploy,pod -n game-2048 -owide
'[AWS] > [EKS]' 카테고리의 다른 글
| 8주차 - K8S CI/CD (1) (1) | 2025.03.30 |
|---|---|
| 8주차 - K8S CI/CD (2) (0) | 2025.03.30 |
| 6주차 - EKS Security (0) | 2025.03.16 |
| 5주차 Study - Autoscaling (0) | 2025.03.09 |
| 4주차 Study - EKS Observability (0) | 2025.03.01 |


